Origami Parrot Tutorial. Easy origami step by step instructions. Fold the flap diagonally over and down to the left as shown.
Learn how to make origami birds with these easy to follow instructions. The origami instructions at origami guide are presented in a clear & simple photo tutorial format. A lot of origami bird models start with the origami bird base, although a lot do not.
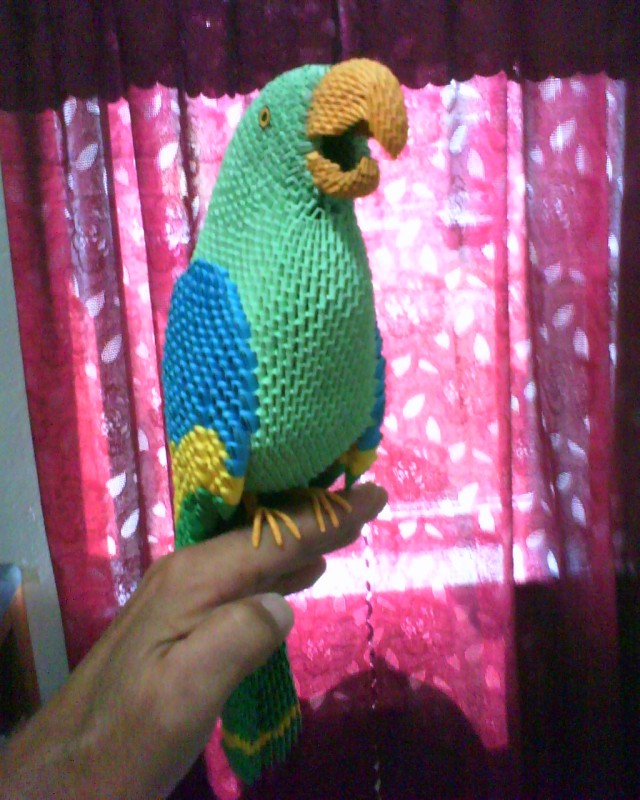
3D Origami Tutorial (Instruction) (We Need:
Origami bird base step 4: All we explained slowly with clear images. Learn how to do origami with our easy to follow, step by step origami instructions.
Step 1) Fold The Paper In Half And Unfold It.
In addition to paper cranes and flapping birds, there are hundreds of other origami bird models. Origami birds make great decorations for the home, you can hang them up or give them as gifts for friends and family. In every origami tutorial, we'll show you how to make a perfect square with your paper, so you can fold.
Fold The Flap Diagonally Over And Down To The Left As Shown.
For the best looking bird, you can use paper thats coloured on both sides: Bring the other flap down from behind to match. Origami is such a fun activity for kids & adults!
Step 7 Fold The Paper Behind Along The Dotted Line.
Step 3) make a rabbit ear fold on each side resulting in a fish base. Bird models are easy to create because a piece of paper has 4 corners and this corresponds with the 4 parts of a bird: Below you'll find instructions for 120+ easy to fold origami models.
Fold The Top Edge Down About Half Way.
363 blue, 135 yellow, 2 green, 2 black and 5 white triangular pieces)let me show you how to make a paper bird. Step 2) fold both sides in to the centre along the dotted lines. Fold the top point of the paper down to the bottom point and crease well.


